Embedding Your Etsy Shop and Products: A Complete Guide for Any Blog or Website in 2024

All photographs are original works taken and created by dreamlikediana. All artwork and content are protected by copyright law. Reproduction or distribution without express written permission is strictly prohibited. ©DREAMLIKEDIANA - All Rights Reserved
With Etsy Mini being gone from Etsy’s website for over a few years now, many of who don’t use or run their website through Wordpress or Shopify are left feeling fragmented. Even though Etsy Mini is gone from their website, as an option, the script for Etsy Mini still works. Today I will show you how the code and how to edit it for it to work for you and your Etsy shop on your website, and make it mobile friendly which wasn’t an option before. This is very easy to do, just follow along.
Disclaimer: I say any website, but for this to work your website needs to be able to add external HTML/CSS code. Which most websites do allow this feature.
Here’s a quick sample of this code using my Etsy shop.
If this is something that could benefit you & your Etsy business, and you want to customize it a little for your site. You’re in the right place.
Things to Note:
There is not many customizations we can do with it, but we can dictate how many products you want to appear on your site within the code.
This code works on all screen sizes! It will also work on a tablet and/or a mobile device.
I can't claim ownership of the Etsy Mini code itself. That is Etsy's code when Etsy Mini used to exist and be more transparent. I'm just bringing it back to the forefront and showing people that it is an option. And also making it mobile & tablet friendly.
Due to the fact this isn't my code, and to emphasize the "mini" in Etsy Mini, you can only showcase 25 products max with this code. This code isn't meant to showcase a full store front - that's what Etsy is for.
I have tried making a new code, but Etsy blocks it completely and it doesn't work. It requires things I don't have and won't get access to, which are: An Etsy developer account, an OAuth token + API key, and some backend code to avoid exposing credentials.
💖 Psst... I also run a small art shop! If you love cute, useful things like stickers, journals, or creative tools—check out what’s new in my store.

Prepping for the Code
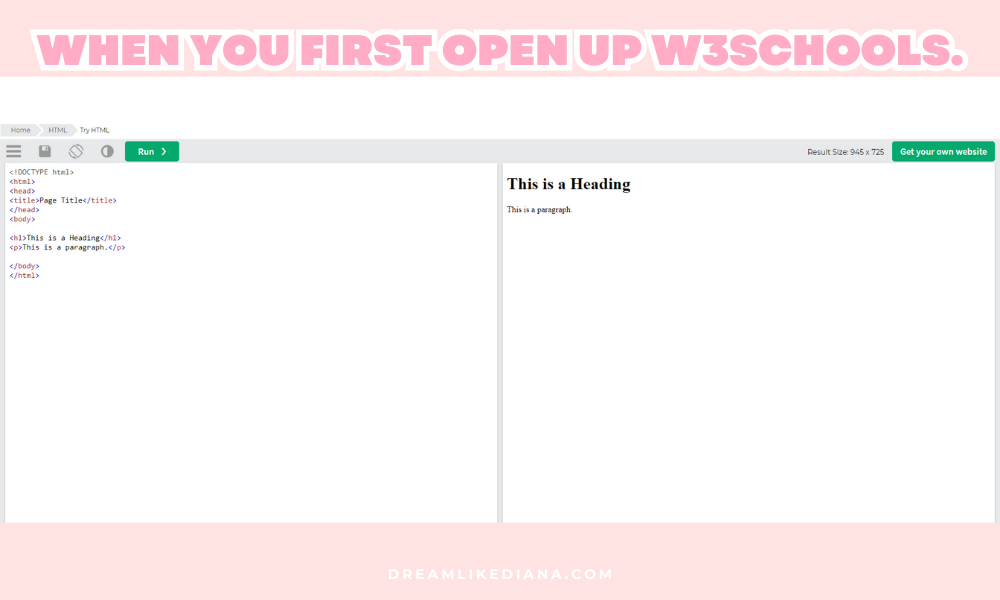
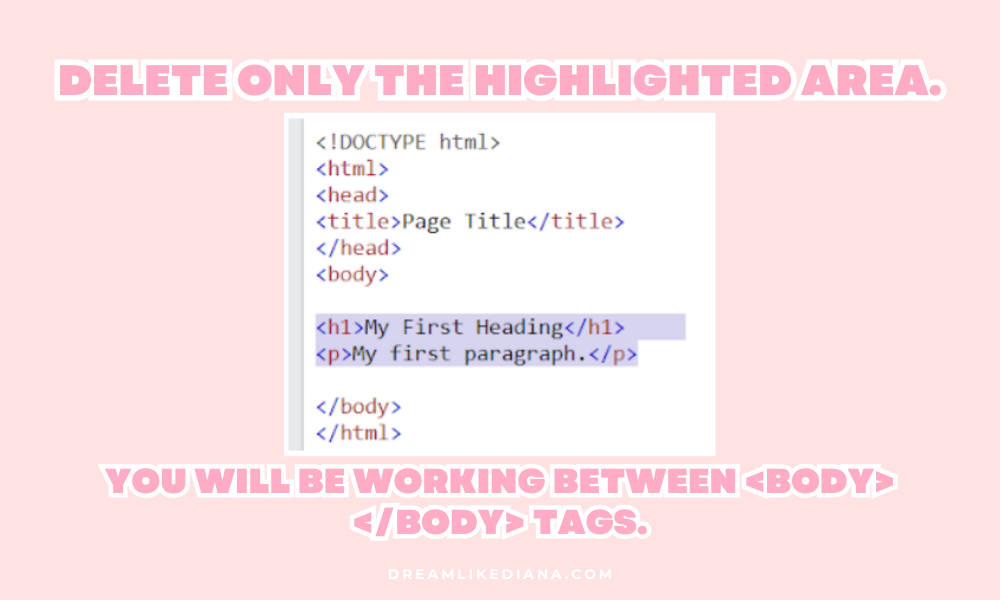
First thing you want to do is open up Notepad on your PC, if you’re running on Mac check out Notepad alternatives here. If you don’t like that then you can open up a page to W3Schools to work and edit with. If you run the W3schools option, you’re going to work in this section that’s highlighted ONLY.
IMAGE
This is where you’re going to paste the code, between the <body> and </body> tags. So you can go ahead and delete the highlighted section.
Finding your Shop ID
Finding your shop ID won’t be anywhere within the settings of your Etsy shop. Instead, you’re going to have to dig a little deeper on the backend of things to find it.
NOTE: I hope you’re not working on mobile or tablet, because this won’t work if you’re on those.
Now, head over to the front of your shop. For example, mine would be, https://www.etsy.com/shop/dreamlikediana.
Once you’re there,
right click anywhere on the screen. A box should pop up,
at the bottom there should be an option called, “View Page Source.” Click on it. It’ll open up a new tab with a bunch of code that may look like jargon for you. But don’t worry, getting your shop ID is easy.
On your keyboard, hold down CTRL & F at the same time if you’re on PC or Command & F on mac. This opens up the option, Search & Find.
In the search box type in "shopid" without the quotations and hit enter. You'll find your shop ID.
Copy the number, and paste it into notepad or whatever just to hold on to it so you don’t lose it. We need it to past it into the code I’m about to provide.
How to find your shopid.
The Original Etsy Mini Code
NOTE: If you’re reading this blog post on mobile, these codes scroll horizontally to fit the screen. To do any form of edits, you will need a laptop or a desktop.
<script type='text/javascript' src='https://www.etsy.com/assets/js/etsy_mini_shop.js'></script>
<script type='text/javascript'>new Etsy.Mini(----------,'gallery',3,3,0,'https://www.etsy.com');</script>
Copy this code and paste into notepad or W3schools.
Then take your shop ID, and
replace "----------" with your Etsy shop ID Number
And wallah! You have a code that works!
Adjust the Layout
In the code, you'll notice 1,3,0. This part of the code controls the layout:
1 = Number of columns
3 = Number of rows
0 = (Unknown parameter - changing it doesn't seem to affect the layout)
For example, if you want to display 2 columns and 2 rows, change 1,3 to 2,2. If you prefer 2 columns with 3 rows, replace 1,3 with 2,3. You can play around with these numbers to find the perfect fit for your site. In the opening of this blog post I’m using 4,1,0 to show my friend’s Etsy shop.
If you need to get everything centered you’ll want to wrap the code with <center> tags:
<center>
<script type='text/javascript' src='https://www.etsy.com/assets/js/etsy_mini_shop.js'></script>
<script type='text/javascript'>new Etsy.Mini(----------,'gallery',2,2,0,'https://www.etsy.com');</script>
</center>
Have fun with the desktop version! Make your own “shop” page on your website, or embed it like I did above like an ad within your blog posts. If you want it in your sidebar it would be 1,4,0. Despite the fact there’s not a lot of customizations you can do with it, you can still do some! Each product links directly to its listing page! It updates on its own. You don’t have to do anything. If you add new listings to your Etsy, the code will update and pull the new products to the top.
Like I said above though, we can’t do too many customization. So we cannot tell the code to only pull certain products. It’s going to just pull all the products. And our coding doesn’t end here, unfortunately, we have one more step just to make it mobile & tablet friendly.
Making the Code Mobile & Tablet Friendly
This is where things get a little tricky. The above code works GREAT on any site when you’re viewing through a PC or desktop screen. The same can’t be said if you’re viewing it through the lens of a mobile screen or tablet device like an iPad.
As I mentioned earlier, Etsy no longer provides the original Etsy Mini code. However, I kept the code and modified it to work on various screens and devices, making it responsive. This means we need to take an extra step, but don't worry—I'll guide you through it. It's simple and looks very similar to the original code.
<div style="text-align:center; max-width: 100%; overflow-x: auto;">
    <script type='text/javascript' src='https://www.etsy.com/assets/js/etsy_mini_shop.js'></script>

    <!-- Desktop Version -->
    <div class="etsy-widget-desktop">
        <script type='text/javascript'>
            new Etsy.Mini(--------, 'gallery', 3, 3, 0, 'https://www.etsy.com');
        </script>
    </div>

    <!-- Tablet Version -->
    <div class="etsy-widget-tablet">
        <script type='text/javascript'>
            new Etsy.Mini(--------, 'gallery', 3, 4, 0, 'https://www.etsy.com');
        </script>
    </div>

    <!-- Mobile Version -->
    <div class="etsy-widget-mobile">
        <script type='text/javascript'>
            new Etsy.Mini(--------, 'gallery', 2, 6, 0, 'https://www.etsy.com');
        </script>
    </div>
</div>

<style>
/* Default: show desktop version */
.etsy-widget-desktop {
    display: block;
}

.etsy-widget-tablet,
.etsy-widget-mobile {
    display: none;
}

/* Tablet (between 768px and 1024px) */
@media screen and (min-width: 768px) and (max-width: 1024px) {
    .etsy-widget-desktop {
        display: none;
    }

    .etsy-widget-tablet {
        display: block;
    }
}

/* Mobile (up to 767px) */
@media screen and (max-width: 767px) {
    .etsy-widget-desktop,
    .etsy-widget-tablet {
        display: none;
    }

    .etsy-widget-mobile {
        display: block;
    }
}
</style>
I know it looks long & daunting, but there’s only a few things to change within this code. Everything else should be left UNTOUCHED.
Replace "----------" with your Etsy shop ID Number in all 3 places,
desktop, tablet,&mobile.Use the numbers you used in the “Original Etsy Mini Code” to dictate what you want in this code for the desktop version.
With tablet, you don’t want the
first numberto exceed by3.For example, the code says
3,4,0. You can change the second number, 4, to a 6 to 8 or any other higher or lower number but the first number, 3, should be left untouched because otherwise it won’t fit onto the screen and no one will see it. Therefore, say you want, 30 products on one page. You would change the numbers:3,4,0to3,10,0. This is telling the code you want 3 columns and 10 rows. 3x10=30.
With the mobile code, it’s very similar to the tablet code but you don’t want the
first numberto exceed by2. The second number can be whatever number you want though! So if you want 20 products you would change the numbers to:2,10,0and so on and so forth.
Adding It To Your Website
Now that you have the code ready, let's talk about how to add it to your specific website platform. Here’s how you can do it on popular platforms:
WordPress
Using the Classic Editor: Go to the page or post where you want to add the shop. Switch to the "Text" editor (HTML view) and paste the code where you'd like it to appear.
Using the Block Editor (Gutenberg): Add a "Custom HTML" block to your page or post and paste the code into that block.
Squarespace
Edit the page where you want the Etsy Mini shop to appear.
Click “Add Block” and select "</> Code".
Delete the existing code that’s there, and paste your code into the block and save your changes.
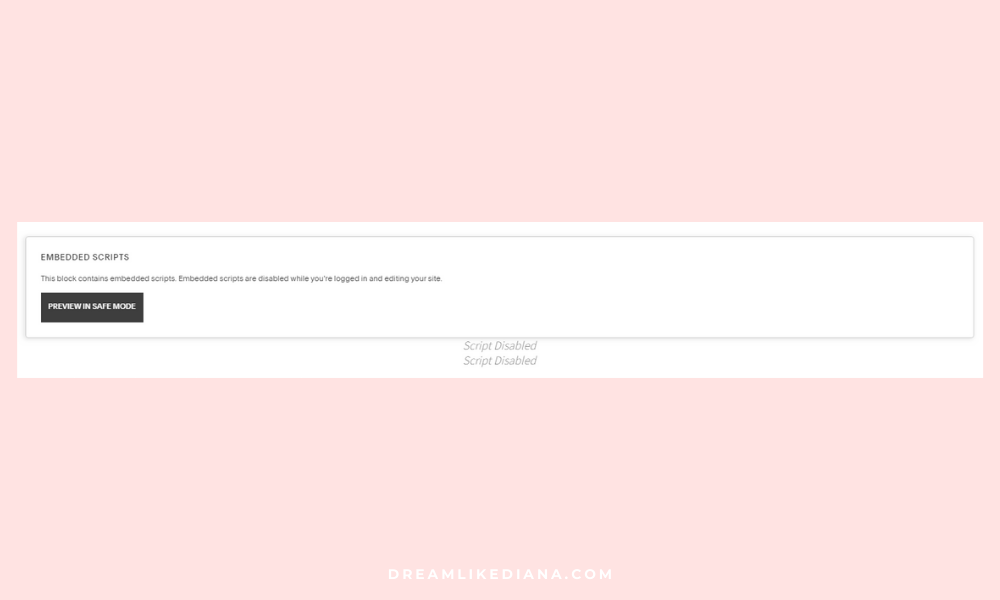
NOTE: If your code on Squarespace looks like this, that's fine. It'll work once you save & exit edit mode. Don't freak out!
Wix
Edit the page where you want to add the Etsy Mini Shop.
Click on the "+" button (Add) and select "Embed" > "Embed a Widget."
Paste the code into the box and click "Update."
Weebly
Open the page editor and drag an "Embed Code" element to where you want the shop to appear.
Click "Edit Custom HTML" and paste the code into the box.
Other Platforms
For other website builders like Webflow or Blogger, the process is similar. Look for an option to add custom HTML or embed code, and then paste your Etsy Mini Shop code in the provided area.
Wrapping It Up
Adding an Etsy Mini Shop to your website is a great way to enhance your online presence and make your products more accessible to your audience. I hope this guide has made the process clear and easy—happy selling!
If you have any comments or questions, or this code helped you leave me a comment down below letting me & others know!
Till next time!
~Diana
Liked this post? You can support me on:
SHOP | AFFILIATES | YOUTUBE | &MORE